Showing posts with label Apartment Planning. Show all posts

Saturday, February 25, 2012

Switching Your Lightbulbs to 'Green' Bulbs


We are all very aware of our Earth's current impending doom known as global warming. We're all using way too much energy and resources without taking the time to let the Earth replenish itself.

Or maybe you don't care about the environment, or think that it is just some government hoax, but I know what you do care about, and that's money. How do I know you care about it? Because everyone does. You need it to live and nobody seems to have enough of it.

So switching your lightbulbs to compact fluorescent bulbs (or CFLs) can save you some money in the long run. They are a little more expensive up front, but they last around 11 years and use less energy during that time, so they save you around $1.50 per bulb, per year.
Our local energy provider is currently doing a giveaway on their website. If you go and sign up (even if you already have an account, or if you are just signing up for a new one), they will send you fifteen free CFLs to help lower your energy usage.

So the hubs went through and signed us up, and we got our bulbs yesterday, so today, I am switching all the bulbs in the house to these little energy saving genies.

Some other energy saving tips:
• Try not to pre-rinse every crumb off your dishes before putting them in the dishwasher, or if you're like me and have a terrible apartment dishwasher, use cold water to rinse them so you don't use the energy to heat up the water that's just going right down the drain.
• Don't use a large pan or pot on a small burner, and don't put a small pan or pot on a large burner. It wastes a lot of energy either way.
• Keep your freezer items close to one another. If all your freezer items are touching the appliance has to work less to keep them frozen, therefore saving you on your energy bill.
• It's the exact opposite for a refrigerator. If you want your refrigerator to use less energy, you have to have the items inside of it spaced a part.

Do you have any tips on living a more 'green' lifestyle? Have you been doing anything around the house to conserve energy?

Friday, February 24, 2012

D.I.Y. First Aid Kit


Something I think every household needs is some sort of first aid kit. Whether or not you just have some band-aids in the back of your medicine cabinet, or if you have a fancy complete ready to buy one, I'm sure that you have some sort of first aid on hand.

The only problem with having it all thrown into your medicine cabinet is its accessibility. Who wants to rummage through old toothpastes and empty prescription bottles to find a band-aid when your child is screaming from a scraped knee? Or if you accidentally touch the oven when putting in those delicious cookies you baked from scratch? (okay, okay, or pulled apart from the frozen package) Having your first aid materials all in one place is convenient in times when you already have something else on your mind.

Now what you may be thinking at this point is, where am I gonna find the cash to buy a first aid kit? Those ready-made ones can be pretty pricey, and usually only come with small amounts of each thing, when you really need more than ten band-aids.

My suggestion to you is to make one yourself. Each time you go to the grocery store you can buy one or two items off your list of must haves, starting with the frequently used items, and slowly build up everything you'll ever need.

What I suggest you buy:
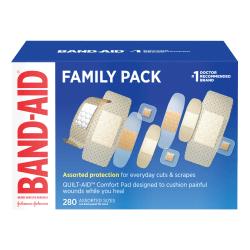
• Band-aids of various shapes and sizes; how many times do you end up with a paper cut, or a child with a scraped knee? Band-aids are simply a part of every family household, and they are a necessity for first aid kits.

• Gauze The only time I have ever really used gauze is on my husbands really bad sports scrapes (and he hates it) or when I get poison ivy to keep the medication on the infection and to stop myself from scratching and spreading. Whatever you use it for, its really good to have laying around.

• Gauze pads These are incredibly handy for the times you don't need to wrap the whole appendage but a band-aid just won't do the job.

• Bandage tape Well you can't use gauze without being able to tape it down can you?

• Safety Pins This one really isn't a must have for your kit, but it will certainly be useful to know exactly where some are in case of emergency.

• Disposable Latex Gloves These are also really important. Say you have one of you friends children over for the night and they scrape their knee. You'll want to put these on to protect yourself from germs. Or if you have a mouth emergency. You don't want to be sticking your unsanitary hands around in there.

• Scissors Obviously scissors have a variety of uses. They can cut the bandages, cut clothes of more serious injuries, pretty much anything.

• Tweezers Besides always knowing where some tweezers are, I imagine these would be useful to get rocks out of a scraped knee, broken glass out of a teeny bare foot, or splinters out of your little boys fingers.

• A Small Cup I actually suggest a couple small cups, so you can dispose of them after a use. Unless you are just planning on washing them. But these are good to fill with a little water to take aspirin with.

• Antiseptic Spray The most important thing when treating a wound is making sure you keep any and all germs out so there is no infection. Having this spray on hand makes sure you won't forget to spray it on your hands before touching things (even though you always promise your kids you won't touch it if they just let you see it, and your first reaction is to touch it immediately) and to sanitize around the wound quickly.


• Burn Ointment This is one I have used a few times. There is nothing like singing your finger on the oven or a pan you forgot was hot. Nothing can take away that burning sensation like burn ointment. So this is something I plan on having access to right away.

• Aspirin You should keep this separate from whatever you use on a regular basis. That way you don't run out and you have this emergency stash, because you never know when you'll need some quickly.

• Calamine Lotion Ever had poison ivy? A few mosquito bites? Then I don't need to explain the importance of this cooling magic gel.

• Aloe As your typical girl, I have spent plenty of time trying to get that lovely bronze glow from both the tanning bed and from the suns natural light. And as a completely pasty white person, I have been sunburned more times than I can count. The only thing that soothes it or the itching that comes with tanning beds is aloe gel. It is a must have for me.

• Thermometer This is an obvious one, its always important to keep your temperature under control. Especially if there is a child or (like me) a pregnant woman around. A serious temperature can cause a lot of problems and having a thermometer on hand allows you to keep it under control.

• Hot Water Bottle When you have a sore spot, the best thing to do is to alternate colt and hot, but you can't do that without someplace to keep your hot water without burning you.

• Ice Packs Important for the same reason above. Nothing makes a sore spot or a wound feel better than when you put some ice on it.

• First Aid Guide All of this stuff is pretty useless unless you know how to use it. And even if you know how to use it, it doesn't mean the baby sitter does, or whoever is opening your first aid kit. So this is really handy to have around.

Something else you will need is some way to keep all your first aid items in one place. I opted for the super cheap tub you see in the top picture, it was only a dollar at the dollar tree (that store is a magical place.) and then I added a vinyl label to it. But you can really do anything you want with it. Large food storage containers, pretty baskets, the sky is the limit. Just make sure you keep it out of reach of the little ones!

I also am going to include a first aid checklist available for you to download for free! Click here to download it.


Do you have a first aid kit at home? Is there any items you think are necessary that I didn't mention above? Leave a comment and let me know!

Thursday, February 9, 2012

Lining Your Cabinets


Why line your cabinets? There are so many answers to this question. It makes your cabinets look very sharp when you open them because there is some texture or design to them that isn't just the normal wood that you're used to seeing. It can also protect the wood underneath if you buy the right kind. I'm one of those people who will put a glass away from the dishwasher even if it still isn't completely dry, and that water can damage the wood over time. Also, it can protect what's in your cabinets. I live in an apartment where 1,000 other people have placed their dishes and appliances in there before me, and I don't really want my plates and glasses touching where there's have touched, even if I did wipe it down really good.

So my mom bought me some Easy Liner with super grip.
It's great for apartments because you have to leave everything in the condition you got it in, so you don't have to worry about messy tearing or peeling since it just grips to the wood. It's awesome!

So here are what my cabinets looked like before:
As you can see they are kinda gross and not really appealing to the eyes at all. So I took my easy liner and got to work.

First measure your cabinets.

Then measure the easy liner and mark where you will need to cut it.


Guess what? Then you cut it.

All you have to do at this point is put your cut easy liner in your cabinets by setting it in there (no adhesive required) and put your stuff back! It's super easy, protects my cups and plates, and can be removed in about .3 seconds when it is time for us to move out again.

Here is what my cabinets looks like after I was done. Still not very organized (I'm not really trying to organize until everything is unpacked) but looking a lot nicer!

Happy projecting! ♥ Jess

Thursday, February 2, 2012

Tips On Moving Into An Apartment

Okay, so yesterday I moved into my apartment with my hubs! We haven't actually moved any of our furniture or anything yet, but we signed the lease and while he was at work my mom, sister and I went to go clean things up a bit.

Let me just tell you, my first impression was misleading. The new white fresh paint makes it all look so clean and beautiful and I didn't think there was a thing wrong with the place. But when you start to get a closer look, you realize that you may have missed a few things. Now don't get me wrong, there is absolutely nothing wrong with the apartment, it is still really nice but it isn't the brand new sparkling candy land apartment I had envisioned in my head.

So here are some tips to help moving into an apartment:

Before you do anything, take pictures.

Go around the apartment and take pictures of every little damage that you see. And make sure the date and timestamp is on the bottom of the photo when you're taking it. Any dent or ding in the fridge, every tiny spot that may be in the carpet, and anything else. Check behind each of the closet doors, check the blinds, check inside the cabinets and on the underside of all the sinks and surfaces. If you think you can get charged for it at any point, snap a photo of it.

I had a friend who did this, and when they moved out the employer tried to sue her for damages that were already done when they had originally moved in, and when they went to court the pictures saved my friend several thousand dollars.

Also, fill out a piece of paper listing and describing any damages that you find to coincide with the pictures (my apartment requires this) and try to get your landlord to sign it. This will also help protect you from any charges.

Even if they 'professionally cleaned," do it yourself also.

Everything had been wiped down and sanitized according to regulation, but nothing was scrubbed and after doing some scrubbing you could tell. So we grabbed our pine-sol, bleach (not me because I'm pregnant), the vacuum and the carper shampooer.

When you think about living somewhere countless of other people have lived, it really makes it easy to wanna just run in hide in the corner. All the potential germs can make you sick. So you just need to spend a day cleaning it and sanitizing it yourself so you can feel comfortable in your new home.

We bleached pretty much the entire bathroom and kitchen, since that's where a lot of the potential germs lie. We also considered washing the walls with pine-sol, but since they just did a fresh coat of paint we didn't think it was necessary. But if your apartment complex doesn't paint after each tenant, then this is something I could consider. Walls usually get ignored in the daily cleaning process.

Wipe down the handles and light switches and anything that gets touched on a daily basis. Also, make sure you dust and vacuum. That apartment has been sitting for quite some time since the last tenant and professional cleaner, and maybe it was even shown to a few potential renters before you. Dust the tops of the doors and the storage railings in the closets and any other surface.

I beg of you, shampoo the carpets.

This was quite possibly the most disgusting thing I'd ever seen. Our carpets were supposedly 'professionally shampooed' after the last tenants, but I don't see how it was a possibility. The water came up a dark brown. It was so nasty, we shampooed them until the water came up clear in the rinse.

If we hadn't cleaned them, our bare feet would be walking on all that dirt and grime (and not just our dirt and grime, OTHER people's dirt and grime, double ew.). And not only that, our little girl could eventually be crawling all over it. Come on now, that's just wrong. So please, rent a carpet cleaner from Kroger or whereever you can in your region and do the carpets. You'll feel better if you do.

Decide if you're going to paint.

Some people do, some people don't. Some people say if you're only living there a year and you have to paint it white again when you leave then why do it? I say, do it, because it really adds a homey feel to the place. I'm not recommending to paint every wall of every room in the house, but I wanted a little color in my apartment since that's where I'll be spending 98% of my time.

So we painted the largest wall in the living room a really pretty blue. It's probably all we're going to paint, except for maybe one wall in the nursery, and it really helps takes the apartment feel away. It's called an accent wall, and if you only have one wall to repaint white when you leave, it really isn't that bad.

Take a magic eraser to the appliances/tile.

Magic erasers really are... magic. Any grime that you sit there and scrub at for hours will come off in two swipes and it really take the age off of tile and refrigerators and makes it look and feel like new.

So what experiences have you had moving into a new apartment? Do you have any tips for me on what I should do while moving?

Happy cleaning! ♥ Jess

Wednesday, February 1, 2012

Packing 101


So you're moving out! It's such a fun new exciting thing, or maybe it's something you've done one hundred times but it's always a hassle. One thing that will make it easier either way is being an organized packer.

For me, I am simply packing up my childhood bedroom at my parent's house and moving into my first little two bedroom apartment with my growing family. It's a lot easier for me because all the appliances we have are still in their original boxes, taped up, just like they were given to us at our wedding, ready to be used. This may not be the case for you but either way, I hope these tips help.

Tips:
Start packing early. Pack up things that will be going into storage or things you don't use on a daily/weekly basis when you find out your moving that way you only have the important things to pack when you're so busy later.

Clean up first. I didn't do this, and I wish I would have. Packing creates a ton of clutter, and that on top of my dirty room clutter really stressed me out.

Try to get some free boxes. I paid $3.00 for each of my boxes (I may have cried a little), and if I was more prepared I wouldn't have had to. You can go to your local grocery or dollar store after they received a delivery and usually they will have no problem sending the broken down boxes your way since they are just going to toss them anyways. Its a little awkward to ask, and usually the sales associate gives you a weird look, but it is a good way to save a little money in the moving process.

Use garbage bags to pack your clothes. There is no reason to have your clothes in a box. Can you think of one? No. And since moving is a very messy process, and odds are you won't have went to the grocery store moving day, you can unpack one of your clothes bags and use it for a garbage bag. Just make sure you label it clothes, so it doesn't accidentally get tossed.

Use every container you have to pack other things. I bought a bunch of storage boxes from IKEA to store different craft and computer things in, and they were never filled to the brim, but you can bet they are now with little knick-knacks that really had no place and my 4x6 pictures frames that I didn't feel like putting in a box.

Come up with a packing plan. Sit down and right down several packing projects you want to get done each day. You'll be getting a lot accomplished without feeling overwhelmed and it also gives you a lot to be able to check off on your to do lists, which is one of my favorite things to do. This is how I broke down packing my room:

Day One: Go through and get out the garbage
I don't know about you, but I'm a mini-hoarder. If I think I may need something someday, I will find somewhere to stick it until that day comes. Sometimes this really pays off and I'll have something I have no idea how to find right on hand. Most of the time, this just causes me to have a cluttered room.

So go through and get rid of all the junk you've been saving for a 'rainy day.' Moving into a new place is one of the only chances an adult has to start over, and make a shiny new life for themselves. Go through stuff you have stuck in boxes or around the room and ask yourself if that is something you want to be in your new life. If yes, keep it around. If you're just trying to wait for an excuse to use it or you don't think you'll need it, toss it. This will make packing a lot easier.

Day Two: Pack up the closet.
This consisted of me going through my clothes, deciding which ones I needed to take with me and what could stay behind in storage. Just make sure you leave out clothes for you to wear until you move. (My parents are luckily not trying to transform my room into a yoga room or anything, so I can leave literally anything I want behind to grab later.)

When that was done I went through my shoes and took out the ones I actually have worn in the last year or so and put the rest in a laundry basket on the floor.

{Anything I don't come back for in the next 6 months is going to Plato's Closet or Good Will. This way I don't get choosey like, well what if I DO need that sometime?}

I also cleaned out the top of my closet which was normally where I kept things for storage, so the majority of that went right into a box. This left a lot of room open for me to put large things I didn't know if I would be coming back for or not, and if not, it too would be put into a box for actual storage.

Day Three: Clean off Walls and Under the Bed
I had a ton of stuff hanging on my walls that I really didn't think fit the look or feel I was going for, so most of this went straight into storage boxes. Other stuff I decided to take with me. It really isn't that stressful when I broke it down as only removing the things on my wall instead of trying to tackle a floor to ceiling area like I had been dreading.

Cleaning out from under the bed wasn't so bad either when I looked at it as one goal. It was mostly empty shoe boxes or lost socks.

Day Four: Pack up the books
To some people, this probably isn't a huge task. You may have that one To Kill A Mockingbird that you had to read for English shoved under magazines and games on your desk. But for me, this was a huge challenge. The last time I counted I had over 450 books, and unfortunately for me, besides furniture, books are the hardest things to move. They are so heavy, so you need about 1,000 little boxes to put them all in.

I boxed them all up and left them in my room so each time I went to my moms house I could grab a couple instead of trying to figure out how to get them all out at once. If there is something you have a large quantity of like this, I definitely recommend moving them in increments to save your back the stress.

Day Five: Pack up the rest of the knick-knacks and clothes/linens
Yep, it's finally that time. Time to pack up everything that you want to take with you. I took the time to launder my remaining clothes and bed linens (no washer or dryer in the apartment) and finally packed them all away, except for what I'd need for the next day.

Go to your bathroom and pack up all your toiletries and make sure you put them in a box you'll be able to find easily. Morning breath never has an excuse, even if it is moving day.

Pack up all the stuff you haven't felt like you'd need to pack yet, because guess what, you do. And throw away or make a donate box for anything you might not need.

Get all your boxes and bags in organized piles to make it easy for your movers (or more likely you) to move and unload. Example: All the kitchen boxes together, all the bedroom stuff together, etc.

And then sit around and wait for the big day to come! There are so many good things and negative things when it comes to moving. What are some things you do to make packing up for a big move less stressful? Have any of you moved recently?

Happy Organizing! ♥ Jess